
Step 1: get the photo onto your computer
Every restoration starts from a digital copy, and the better the copy, the better the result.
- A flatbed scanner at 600 DPI is best. A 4×6 print scanned at 600 DPI comes out at 2,400 × 3,600 pixels, plenty for any repair and for printing larger. Many libraries and print shops will scan photos for you.
- With a phone, take the print out of its frame or plastic sleeve, lay it flat near a window, turn the flash off and hold the phone directly above it so the print fills the screen. Google PhotoScan, a free app, removes glare by combining several shots.
- Fill the picture with the print. A small print in a wide shot of the table loses too much detail to restore well.
- Wipe dust off the print with a soft brush first, and never force a curled or brittle print flat.
Step 2: choose how to restore it
| Method | Cost | Skill needed | Best for |
|---|---|---|---|
| Healing tool in GIMP or Photopea | Cost: Free | Skill needed: Some practice | Best for: A few scratches, dust spots, a small crease |
| Free AI apps | Cost: Free, often with limits or watermarks | Skill needed: None | Best for: A quick look at a lightly damaged photo |
| AI restoration (Resly) | Cost: One small price per photo | Skill needed: None | Best for: Tears, fading, heavy scratches, colorizing, printing big |
| A professional retoucher | Cost: Priced per photo by the damage | Skill needed: None | Best for: A single treasured photo with missing pieces |
For a photo with a few scratches, the free route works: open the scan in GIMP or Photopea, pick the healing tool, and paint over each scratch so it blends with the area around it. Work zoomed in and in short strokes. It is slow on a badly damaged photo, and a tear across a face is hard to do convincingly by hand.
AI restoration repairs the whole photo at once: tears, cracks, scratches, stains, fading and old color casts. With Resly, upload the photo on the restore old photos page, choose whether to keep its colors or add color, pick a print size if you want one, and the restored photo is back in about 20 seconds.
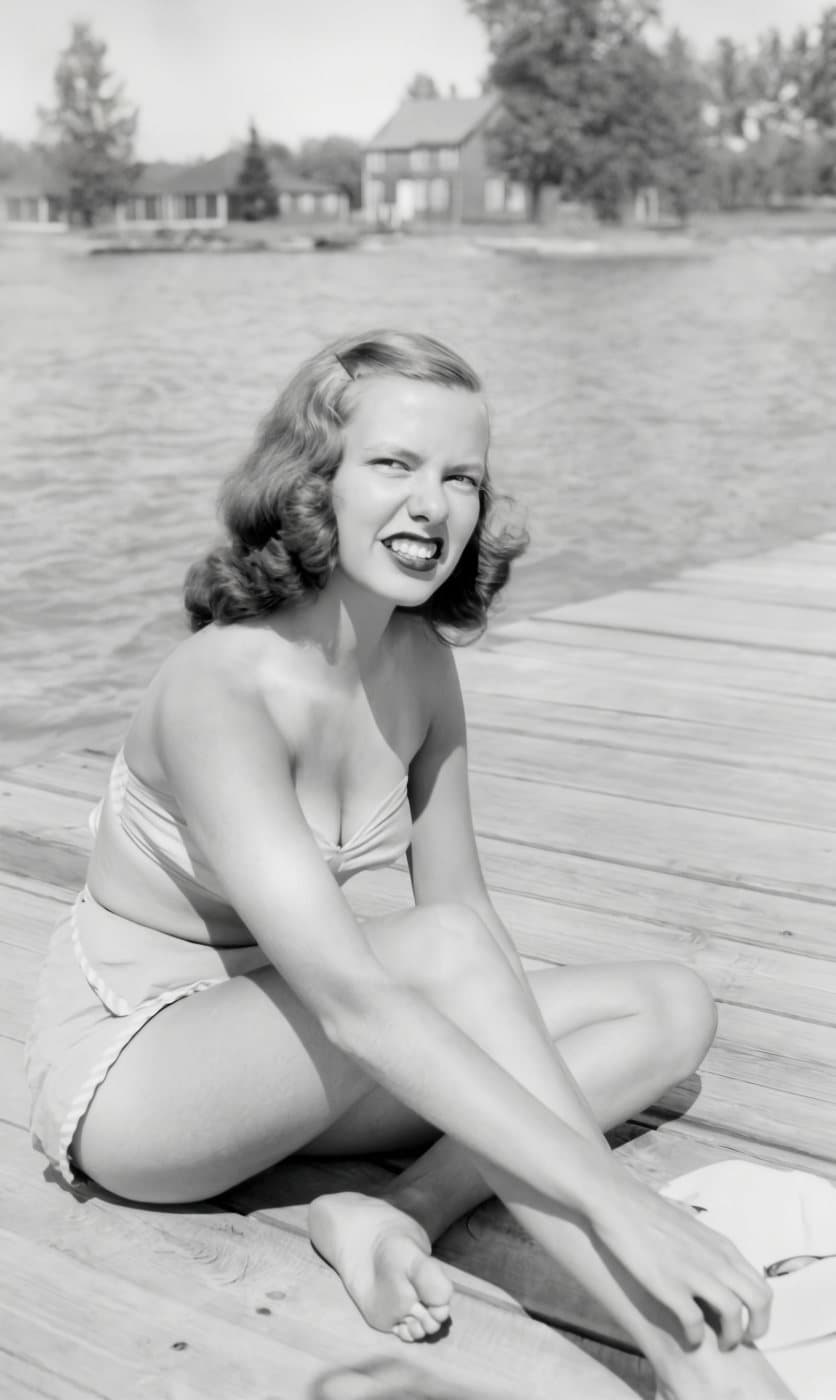
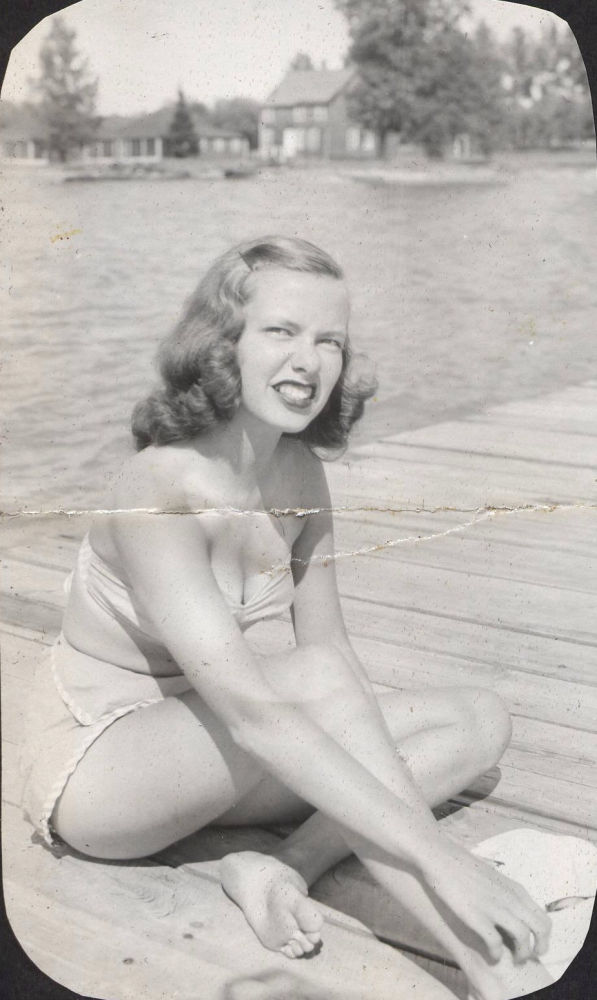 BeforeAfter
Faded color photos
Color prints from the 1960s to the 1980s fade unevenly: the cyan dye goes first, so they drift toward purple, magenta, orange or yellow. Raising the saturation only makes the cast stronger. Restoring them means correcting the balance until whites are white and skin looks like skin again, which AI restoration does as part of the repair.
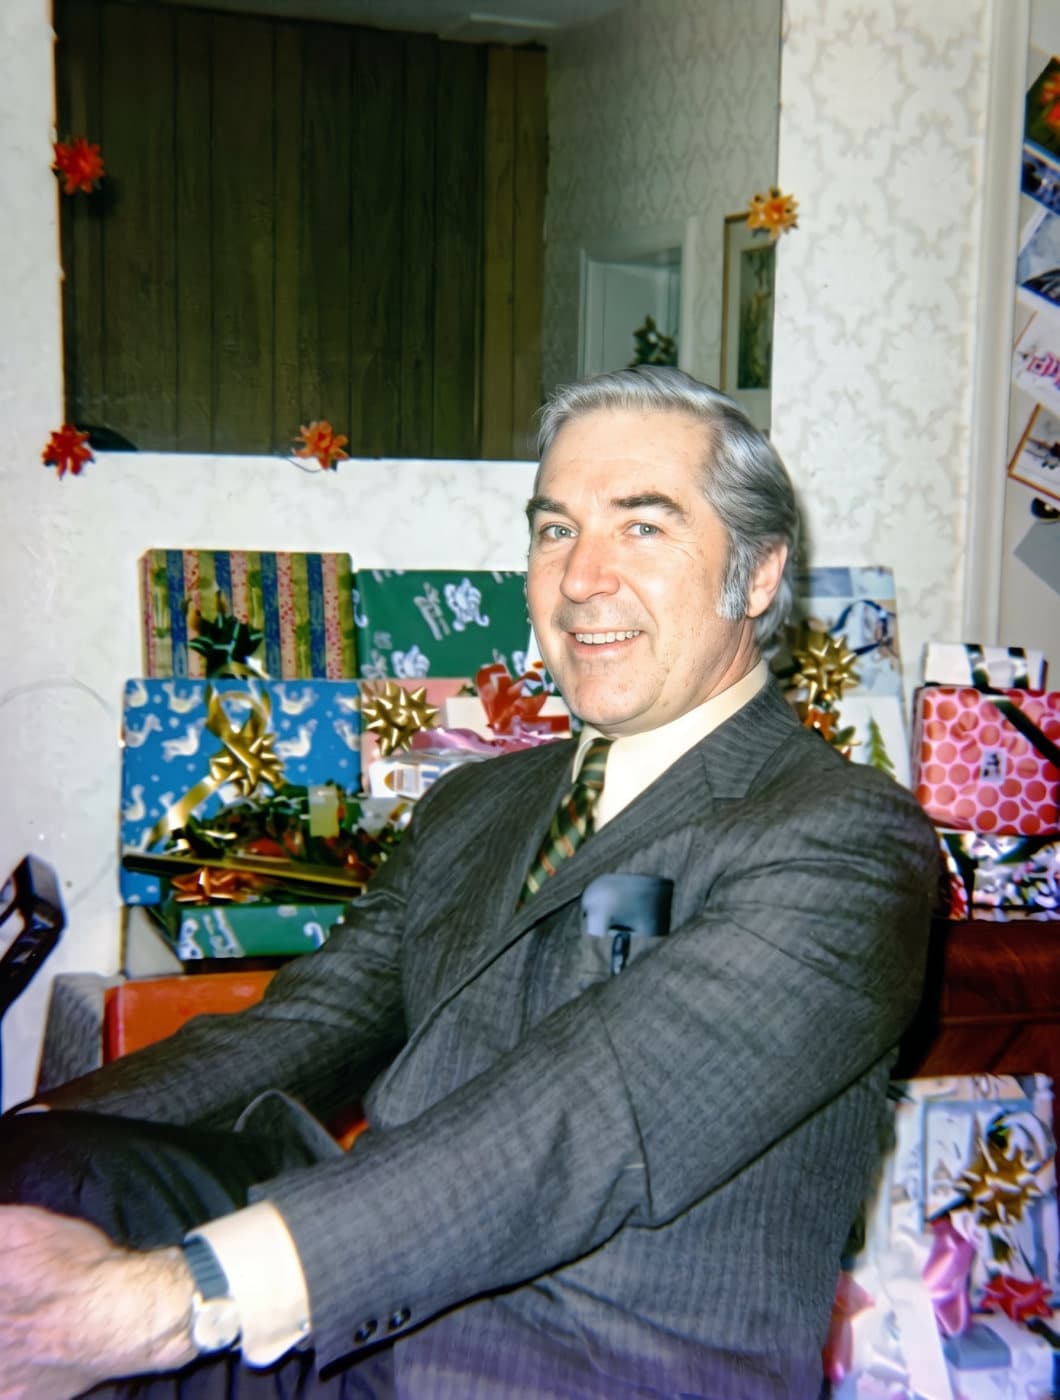
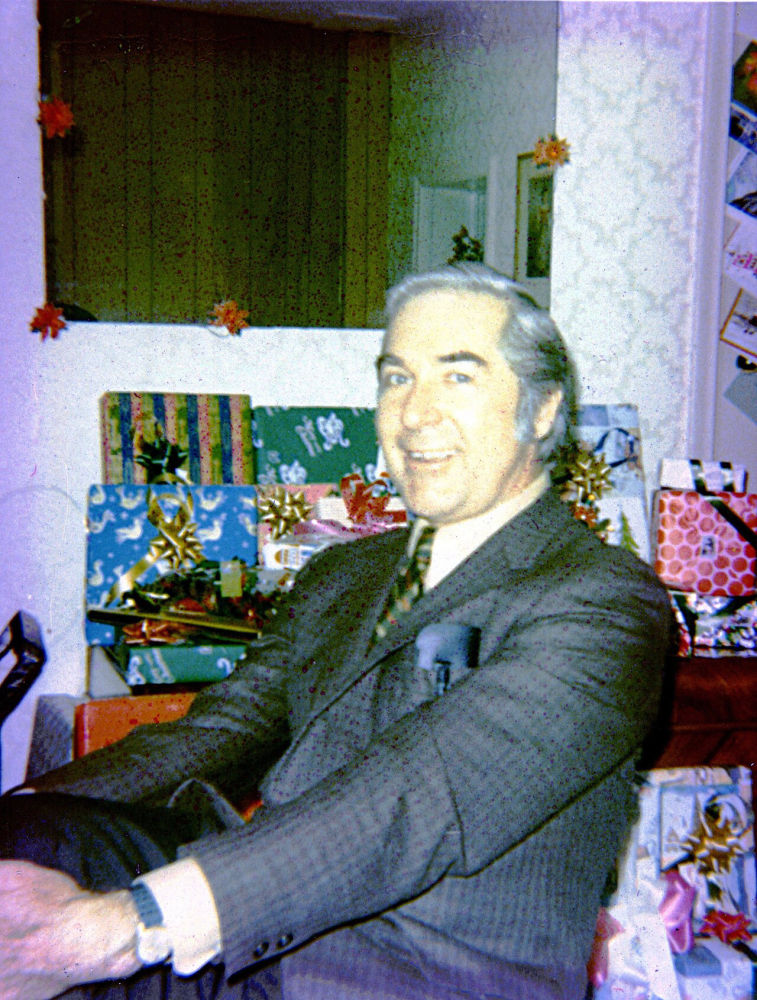 BeforeAfter
Colorizing black-and-white photos
Colorizing adds natural color to a black-and-white photo. It is an informed guess: skin, sky and grass come out close to life, but the true color of a dress or a car was never recorded, so it can only be made believable, not recovered.
Restore before you colorize, or the scratches come out in color too. On the colorize photos page, both happen in one pass. If a face looks less like the person in color, keep that photo in black and white.
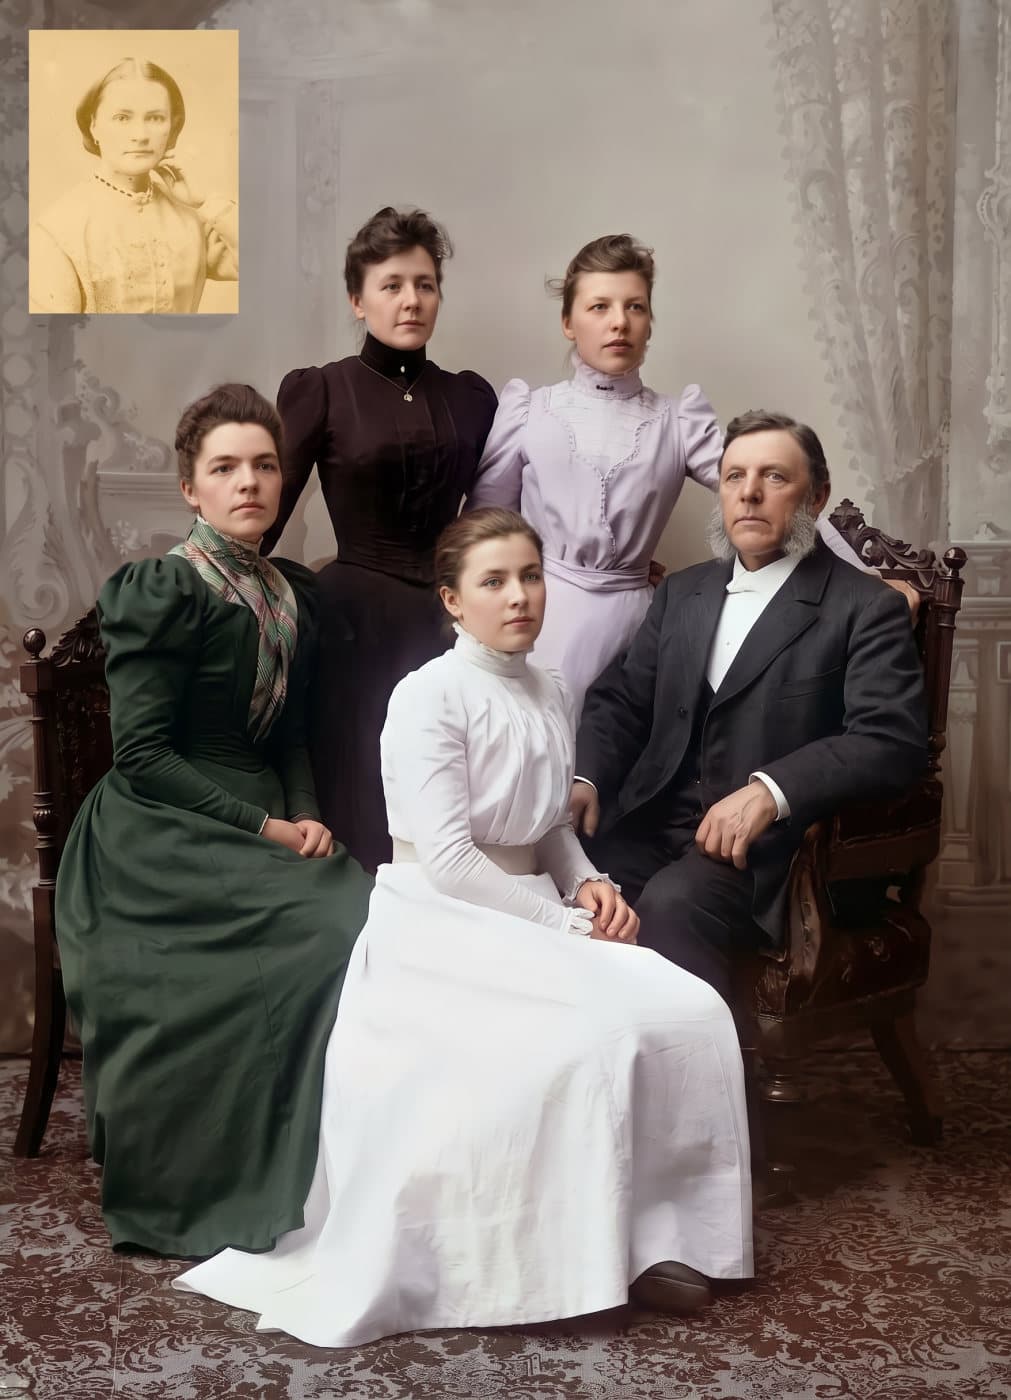
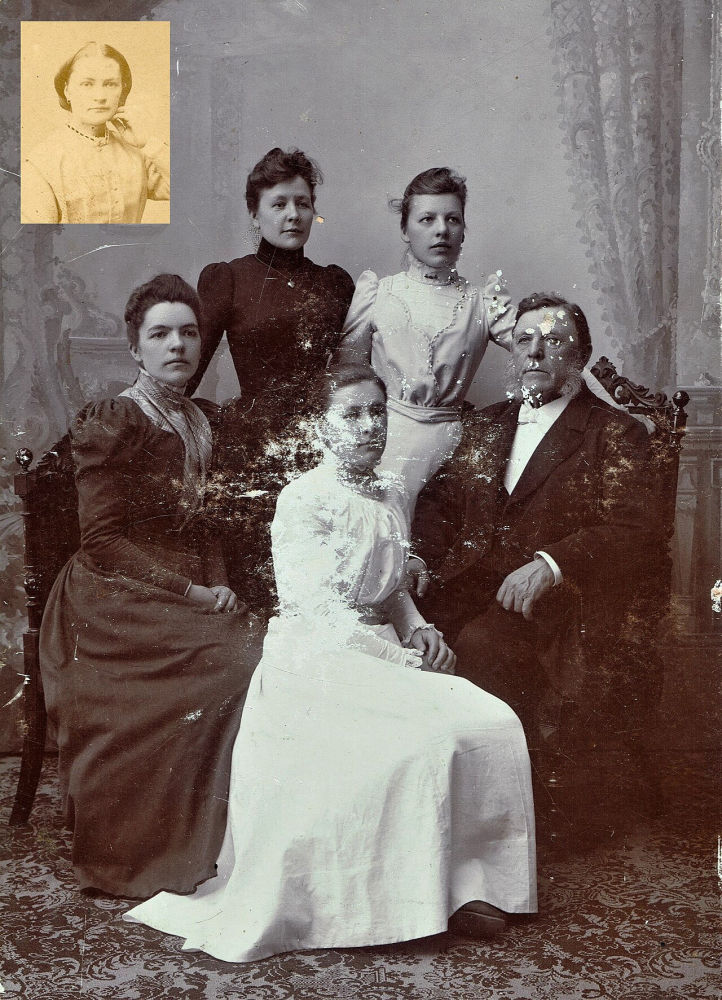 BeforeAfter
What no restoration can bring back
- A face that is torn away, water-damaged or faded to nothing. Any restoration, by software or a person, has to invent it, and it may not look like them.
- Missed focus or heavy motion blur. Restoration sharpens, but it cannot recover detail the camera never captured.
- The true colors of a black-and-white photo, as above.
When most of a face survives, a good restoration keeps it theirs. Always compare the result with the original before printing or sharing it.
Step 3: print it and keep it safe
A restored photo makes a fine gift, framed. Pick the print size before you restore, so the file comes out exactly that shape; the print size chart shows what each size needs.
Keep the original print too, in an acid-free sleeve or box away from sunlight, heat and damp. Save the restored file in more than one place, such as a computer and a cloud account, and share copies with family so it can never be lost again.